
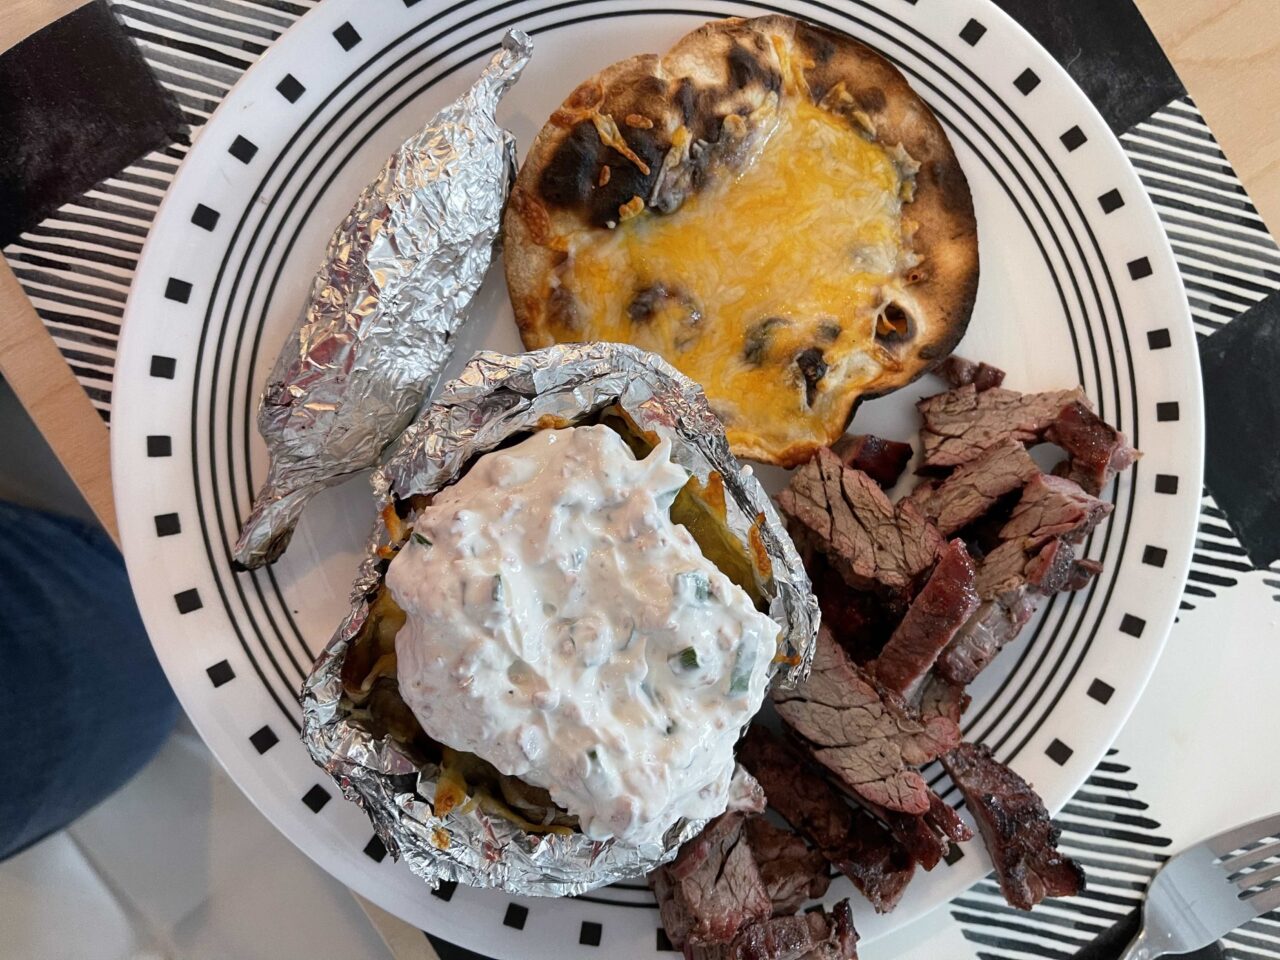
Yes, I do love software development and operations, but that’s not it! Another thing I love is cooking, especially when on a grill. My wife always says that a carne asada is not carne asada without the sides; to which I disagree since sometimes I just want a quick steak. But because I love her I usually do the whole thing. That’s why I will show you how to make a full meal of carne asada, including a side of cream cheese peppers, grilled onion, and a baked potato with a super delicious cream on top! Be sure to check this post, give it a try, and let me know your results.
Ingredients
Let’s start! First things first, we need to gather all of the ingredients to have them. Being an engineer, I got you a nice checklist you can take with you to do a quick stop at the grocery store:
- 1 Onion
- 2 bunch green onions
- 16oz Sour Cream
- 9-12oz bag of bacon bits
- 3-4 limes
- 8 Russet Potatoes
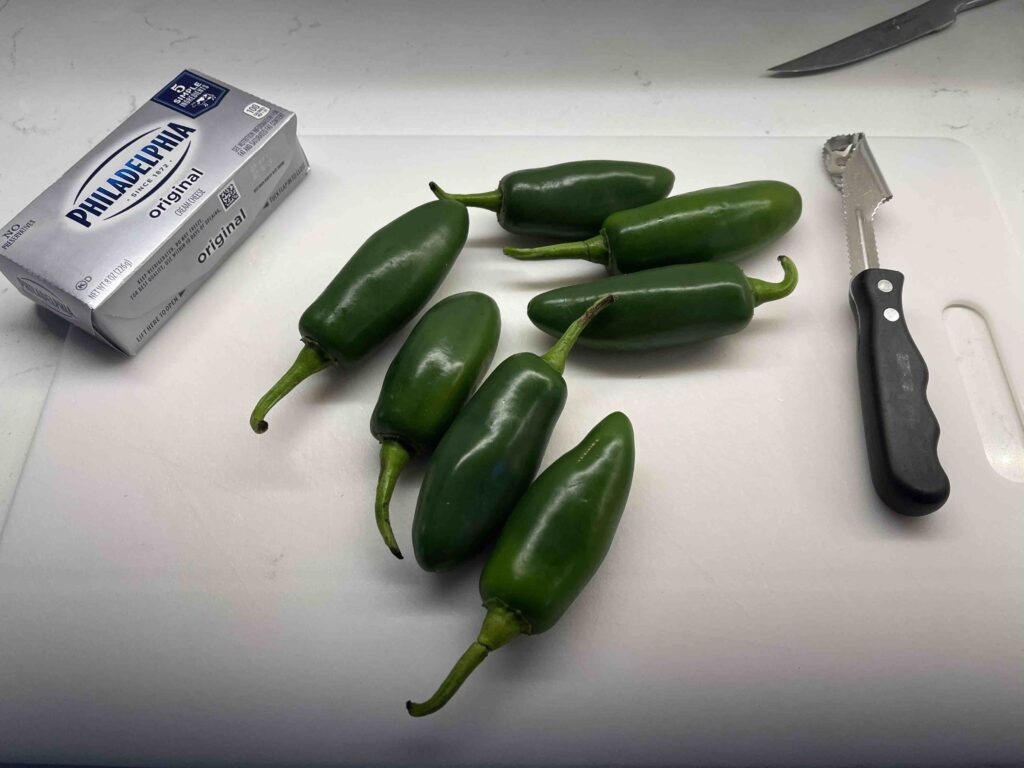
- 8oz cream cheese
- 8-10 jalapeño peppers
- Aluminum foil
- Butter
- Cheese
- Tortillas
- Charcoal for the grill! (or gas, although I prefer charcoal)
Now, you got pretty much everything needed for the sides. Easy right?! Now the main dish… the meat. This is the most important part is choosing the right meat, and for carne asada, there is no better cut than skirt steak. In the US it’s very difficult to get the right cut. Even if you go to a Mexican store, make sure you get skirt steak and not “fajita” steak; which is NOT the same although most people say it is. Also, don’t get the marinated steak since it gives some weird flavors unless… go to Costo and try to find this meat:
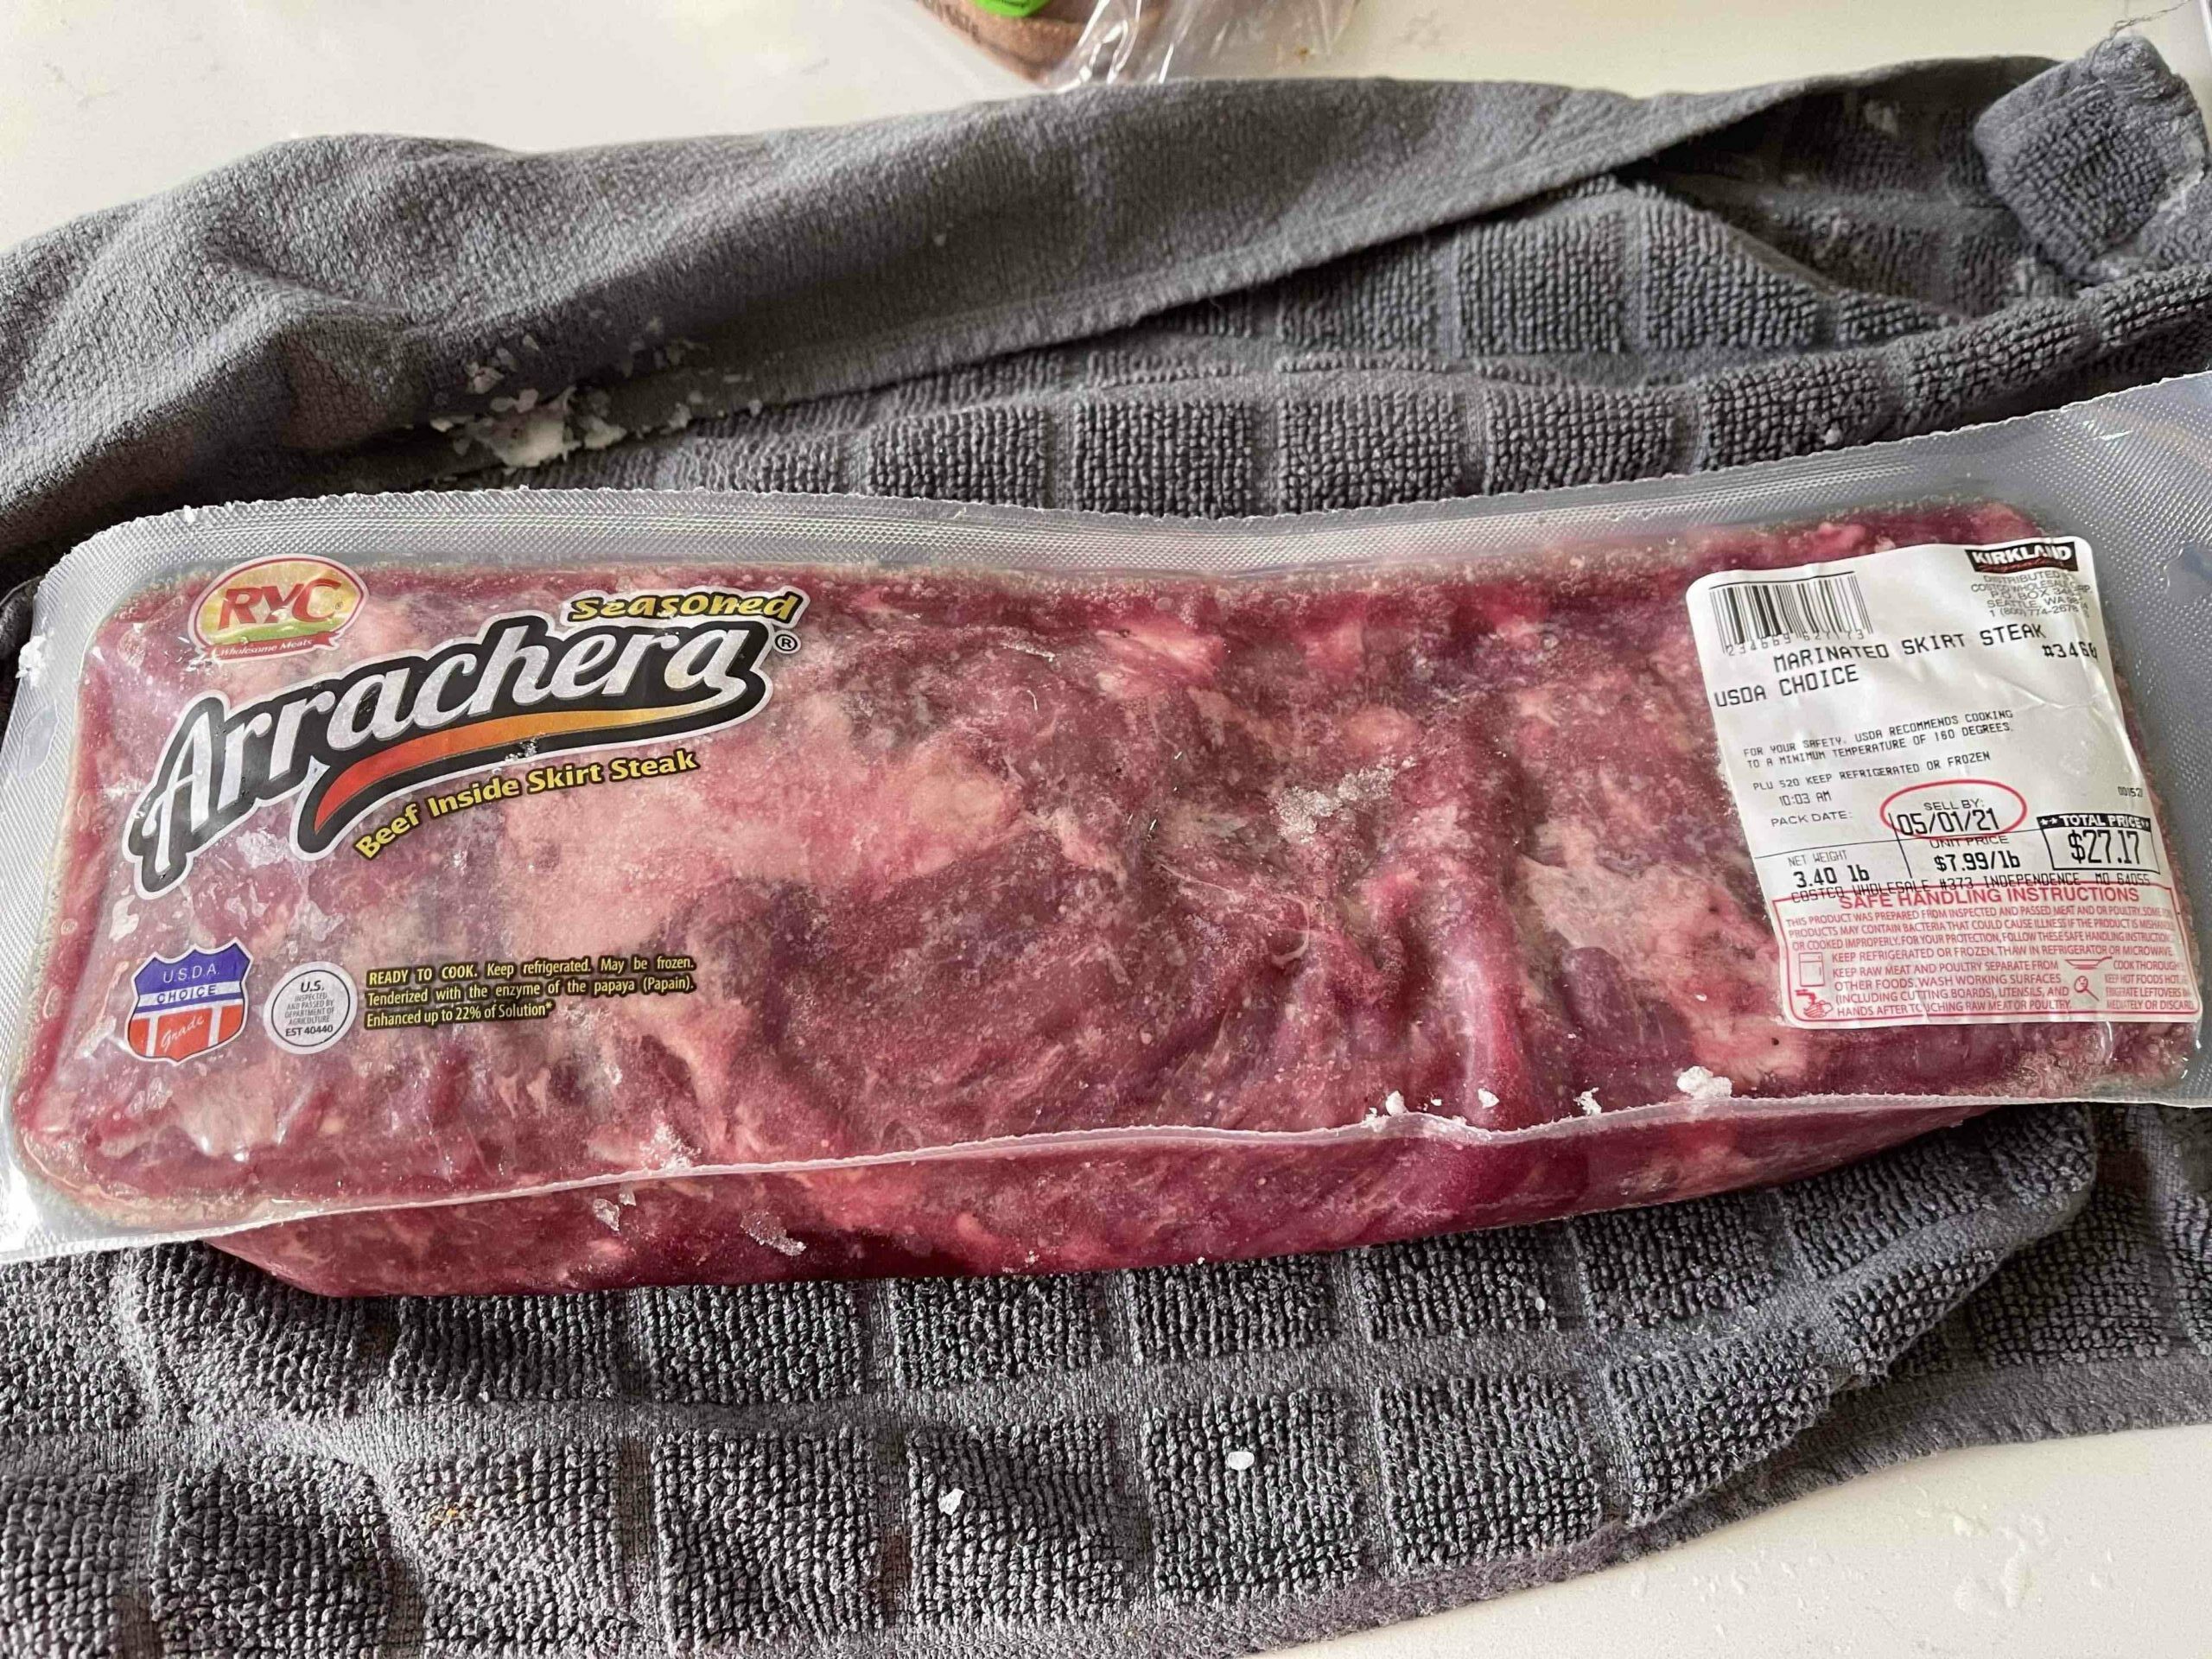
I have no idea how they do it, but that is the best arrachera (skirt steak) I’ve found so far in the US! If you can find it, you are in luck.
Baked Potatoe Topping
Let’s start with something easy and “mess-free” and that you can do a day before if you’d like. First, wash your green onions and start cutting the stem (green part) into small round pieces. I wish I had a picture taken to show you how it looks like but I forgot, just make sure you only do the green part and don’t go all the way because the closer to the onion the stronger it tastes, we just want some flavor.
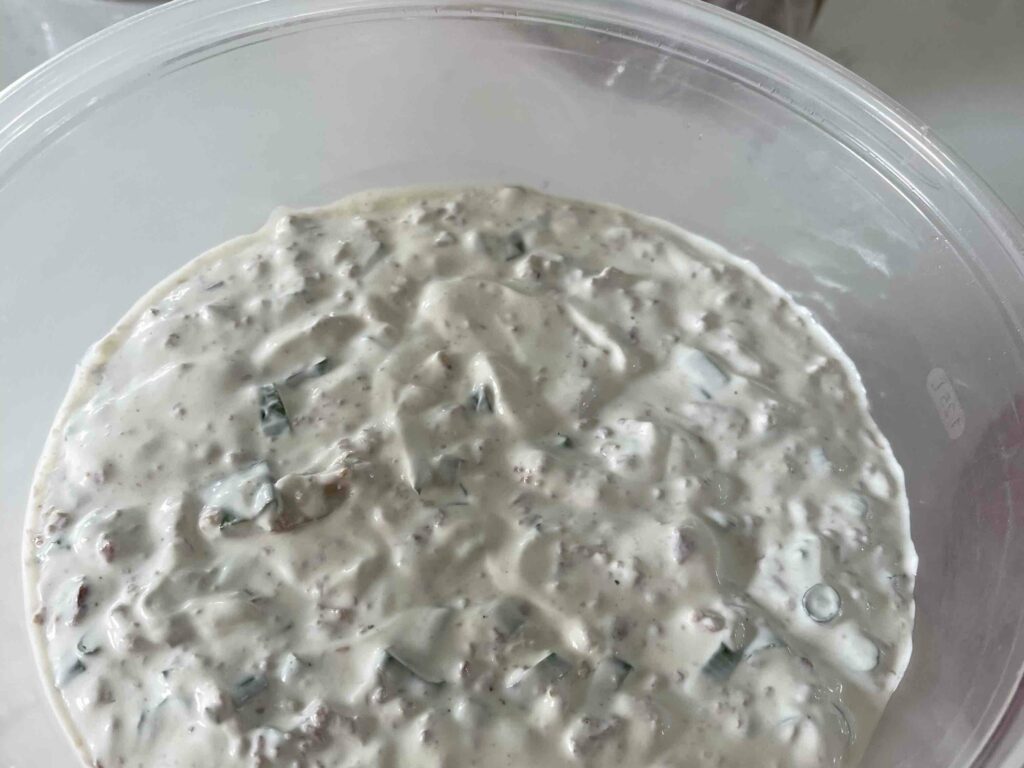
Once you have that ready, get a large bowl and just mix the sour cream, bacon bits, chopped green onion stem, squeeze 3 limes and add salt and pepper. Using a large spoon, mix all the ingredients until they are evenly distributed. Once done just cover and store it in the fridge.
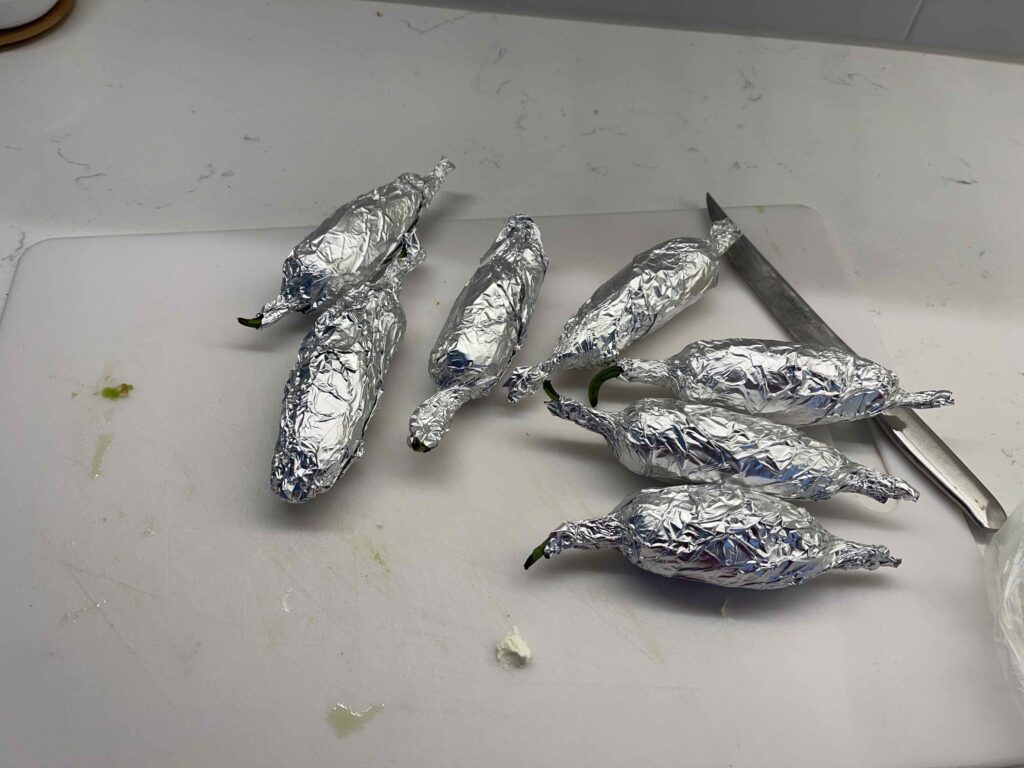
Wrap all the things in Aluminum!
This is also something you can do a day ahead to relieve all stress and concentrate on grilling the next day. Timing is always important when grilling, so the better prepared the less problem it will be running around preparing everything while grilling.
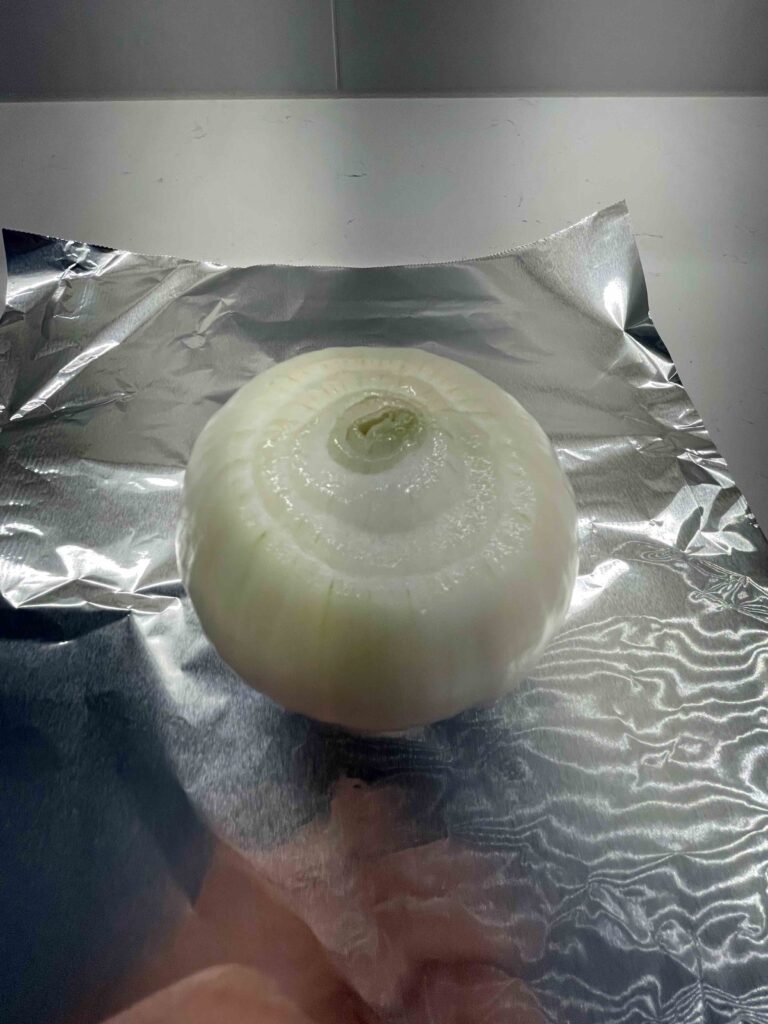
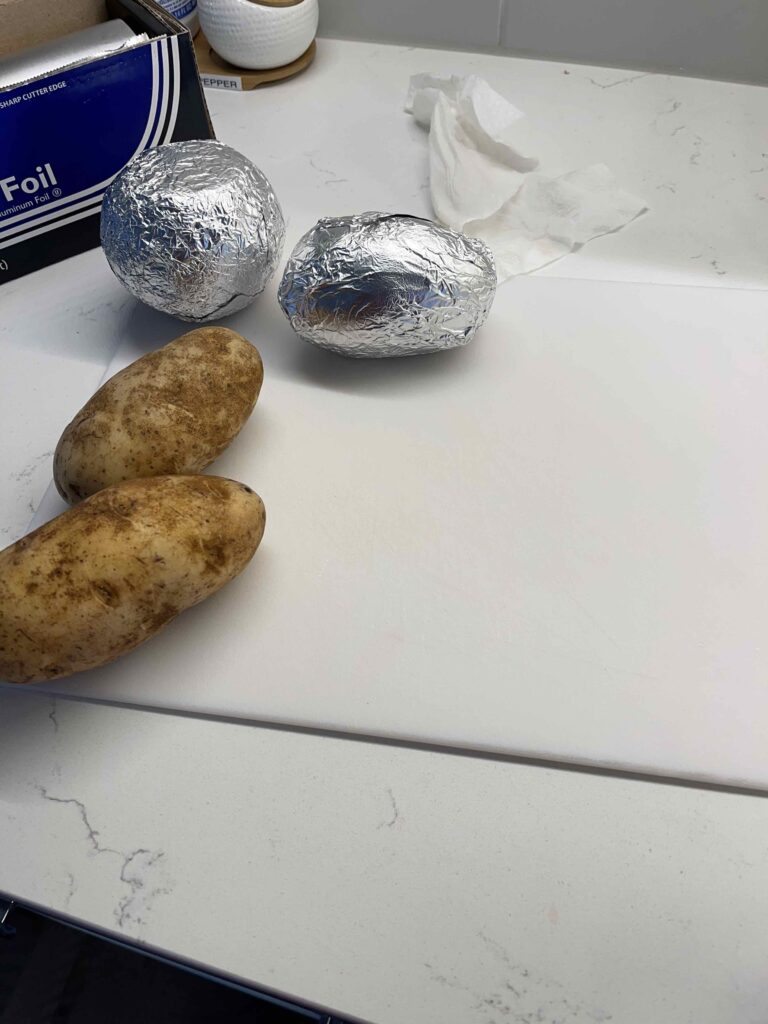
Take the onion and chop the ends of it with the knife. You just need to take the ends off so that after cooking you just need to unwrap and that’s it. Once done, wrap it in aluminum foil. Actually, be sure to wrap it twice! This way it will prevent it to be burned on the outside but will be well cooked instead. Oh! And make sure to wrap it with the “shiny” side of the foil to the inside of the onion, you will do this with everything we will be wrapping.
Next, wash the russet potatoes and the jalapeño peppers. Once that is done, dry them and set them aside. Start by wrapping the russet potatoes in aluminum and wrap them twice.
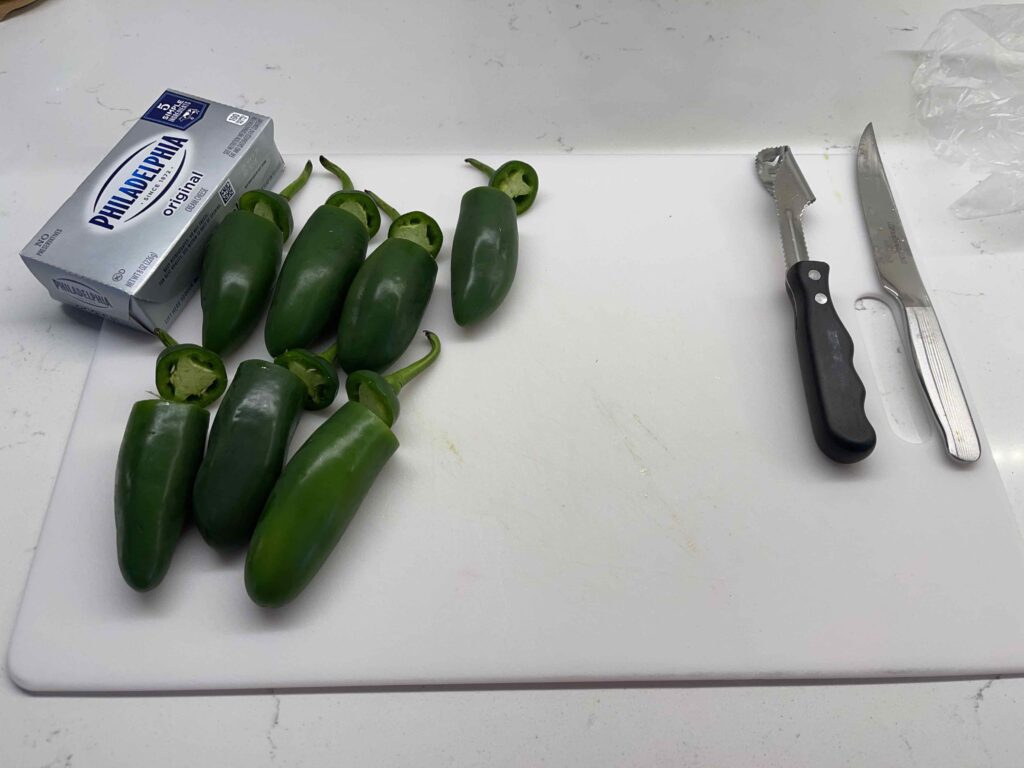
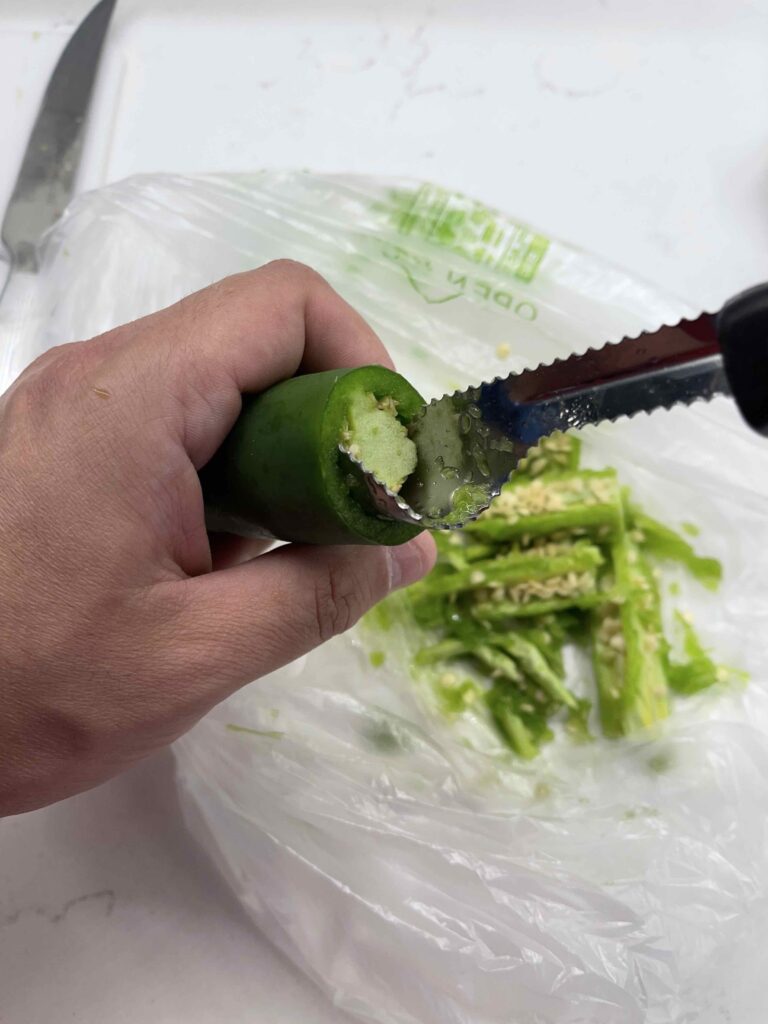
Next, take the jalapeño peppers and chop part of the top off; but don’t discard them we will use them to “close” the peppers. Once you have that, with a knife take all the seeds out. Funny, my wife bought a tool she found online specifically for this purpose which you can find on Amazon; but you can use a knife if you want, just take ALL the seeds out. Once done, fill those peppers with cream cheese, you can use a knife or a spoon for this. And finally, place the top part with each pepper and wrap each one in aluminum foil. This time wrap them just once! We want them a little bit charred on the outside. Make sure to store the jalapeños on the fridge until they are needed.
Preparing the Grill
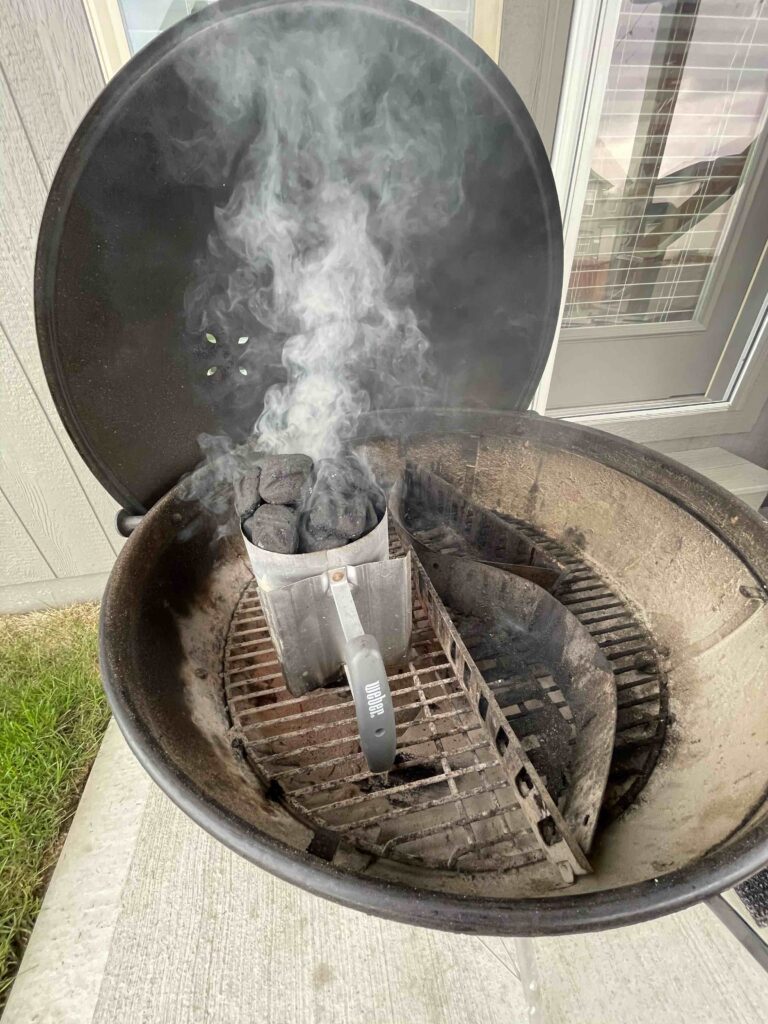
So, most of my Mexican friends and especially from my hometown are going to be disappointed with the techniques I’ve been using to start the grill, but I’m lazy and I have more important ways of spending my time rather than fighting the grill. NO! NEVER EVER use “lighter fluid” on the grill; that thing is not only dangerous but can leave a characteristic taste in the food when cooked. You’ve been surprised to hear that on BBQ tournaments I’ve been able to blind taste and know when someone used lighter fluid and didn’t do it properly. For that reason, it’s better to use a charcoal chimney and some lighter cubes so that you are not fighting the smoke and can be doing something else.
Once the charcoals are lit, the top ones have a bit of grey ash showing up, dump them on one side of the grill, and throw more charcoal on top. To measure charcoal, use the chimney starter and dump 1 time or two times what fits inside. This depends highly on your grill size and the weather outside; grilling is an exact science and you will only learn by practice.
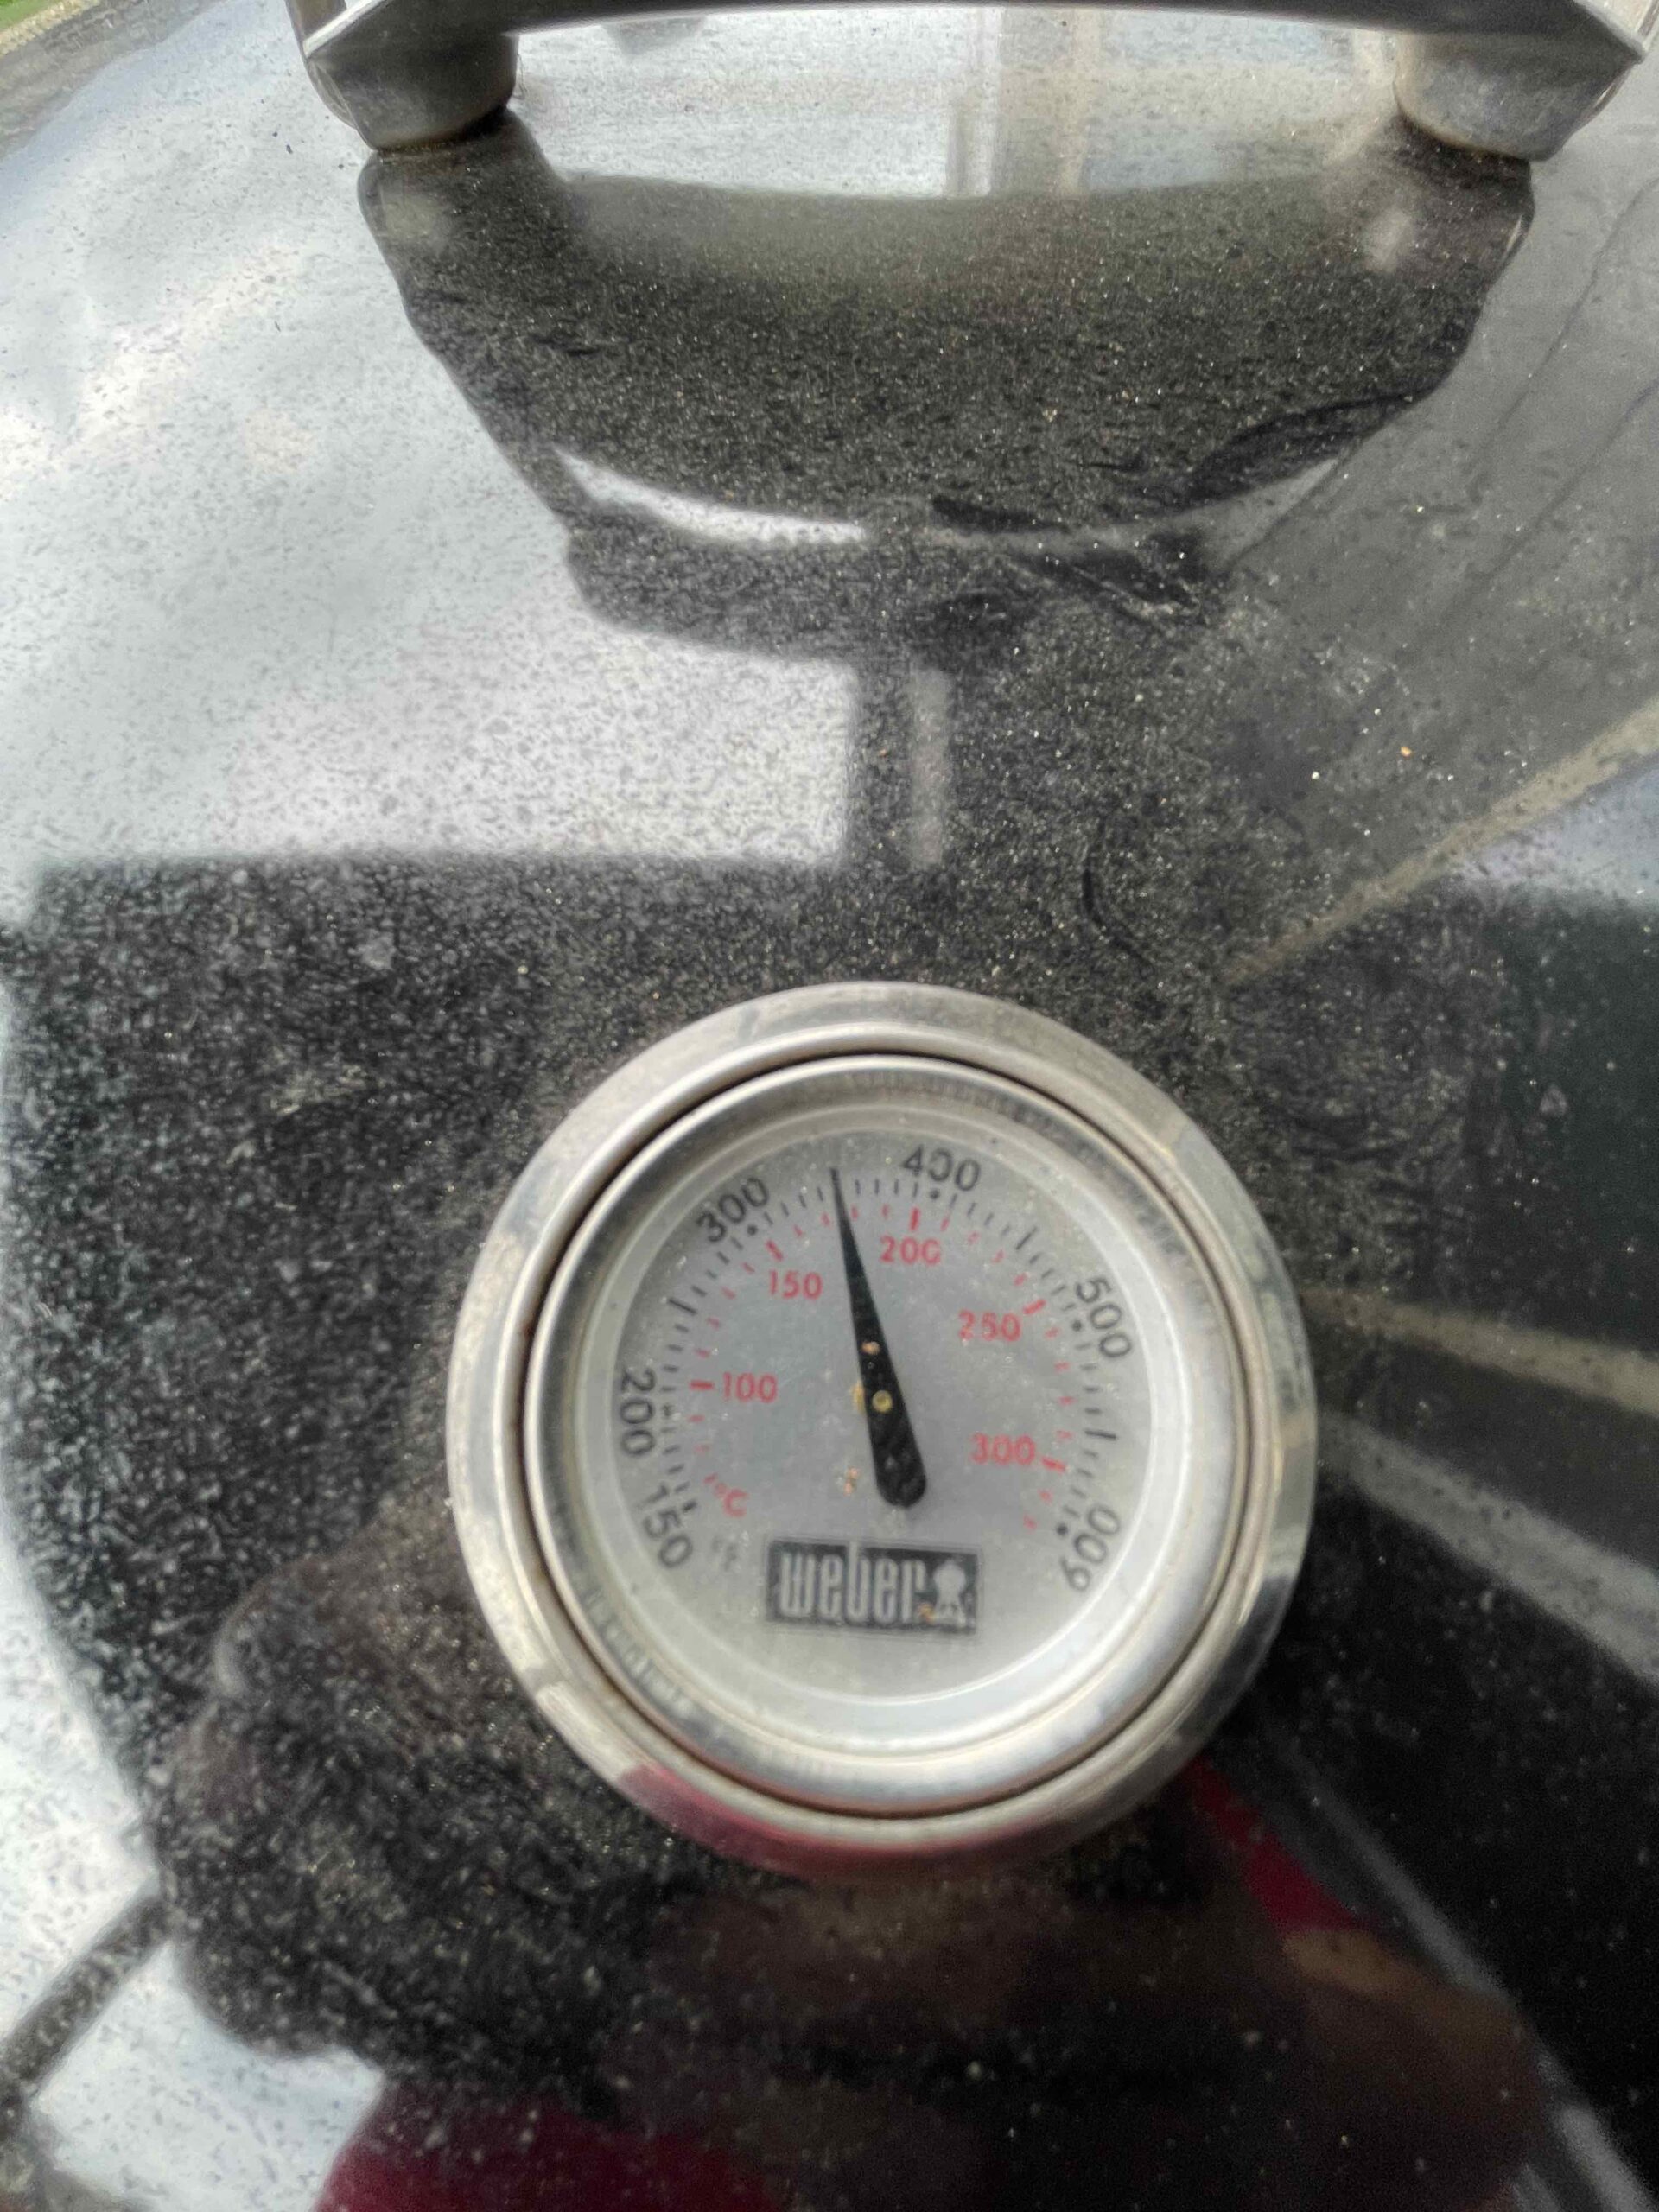
Dumping the charcoal on one side of the grill helps you have a two-zone setup. This means, that you’ll have one side that has a lot of heat good for searing and another one with medium heat used for cooking. You can get some fancy dividers online; sometimes they come with the grill. The idea is to control the heat so that the medium heat size is around 350F. This two-zone approach takes practice so don’t get frustrated if you can get it exactly like that.
Cooking the Sides
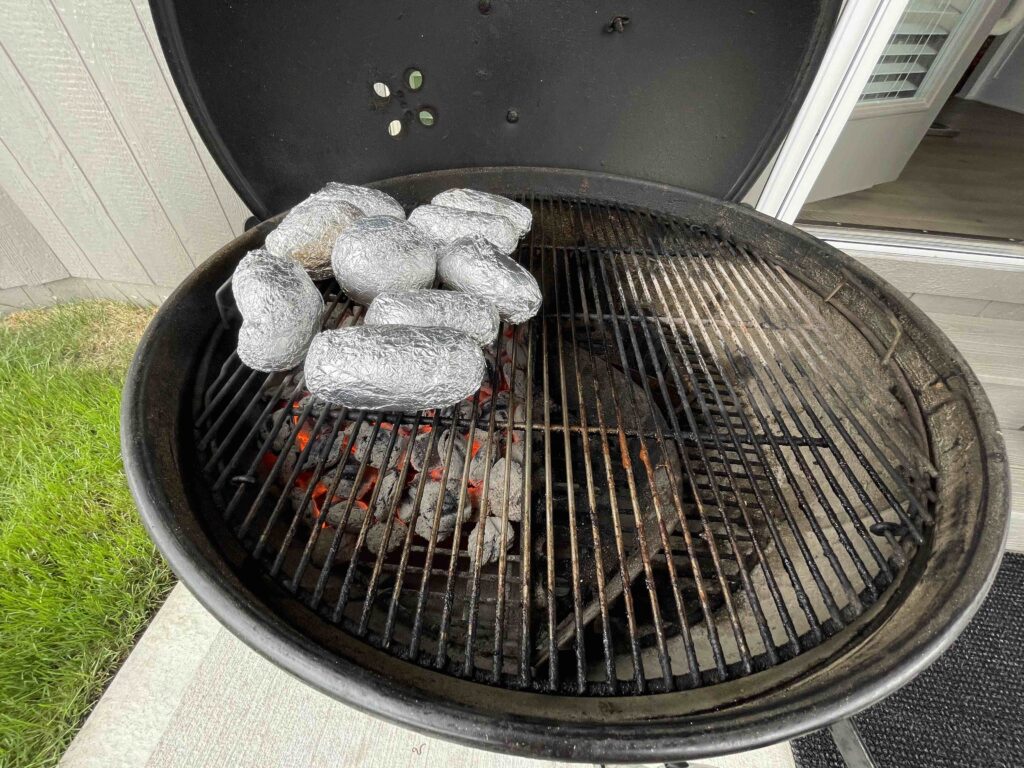
Let’s start baking the potatoes because this can be a long process. The good thing is that there is no science to it. So, start by placing the potatoes and the onion on top of the hot side of your setup, right above the lit charcoals. Always close the lid when cooking the sides, this will keep your grill running longer. Keep them there for about 15mins and then flip them for another 15min. After that, place them in your medium heat zone for 30mins and add the jalapeño peppers to the grill. Then, it’s time to start checking if potatoes are done; for this, I just press my finger on the potatoes to check how “squishy” it feels, BUT be careful! Remember aluminum can get really hot.
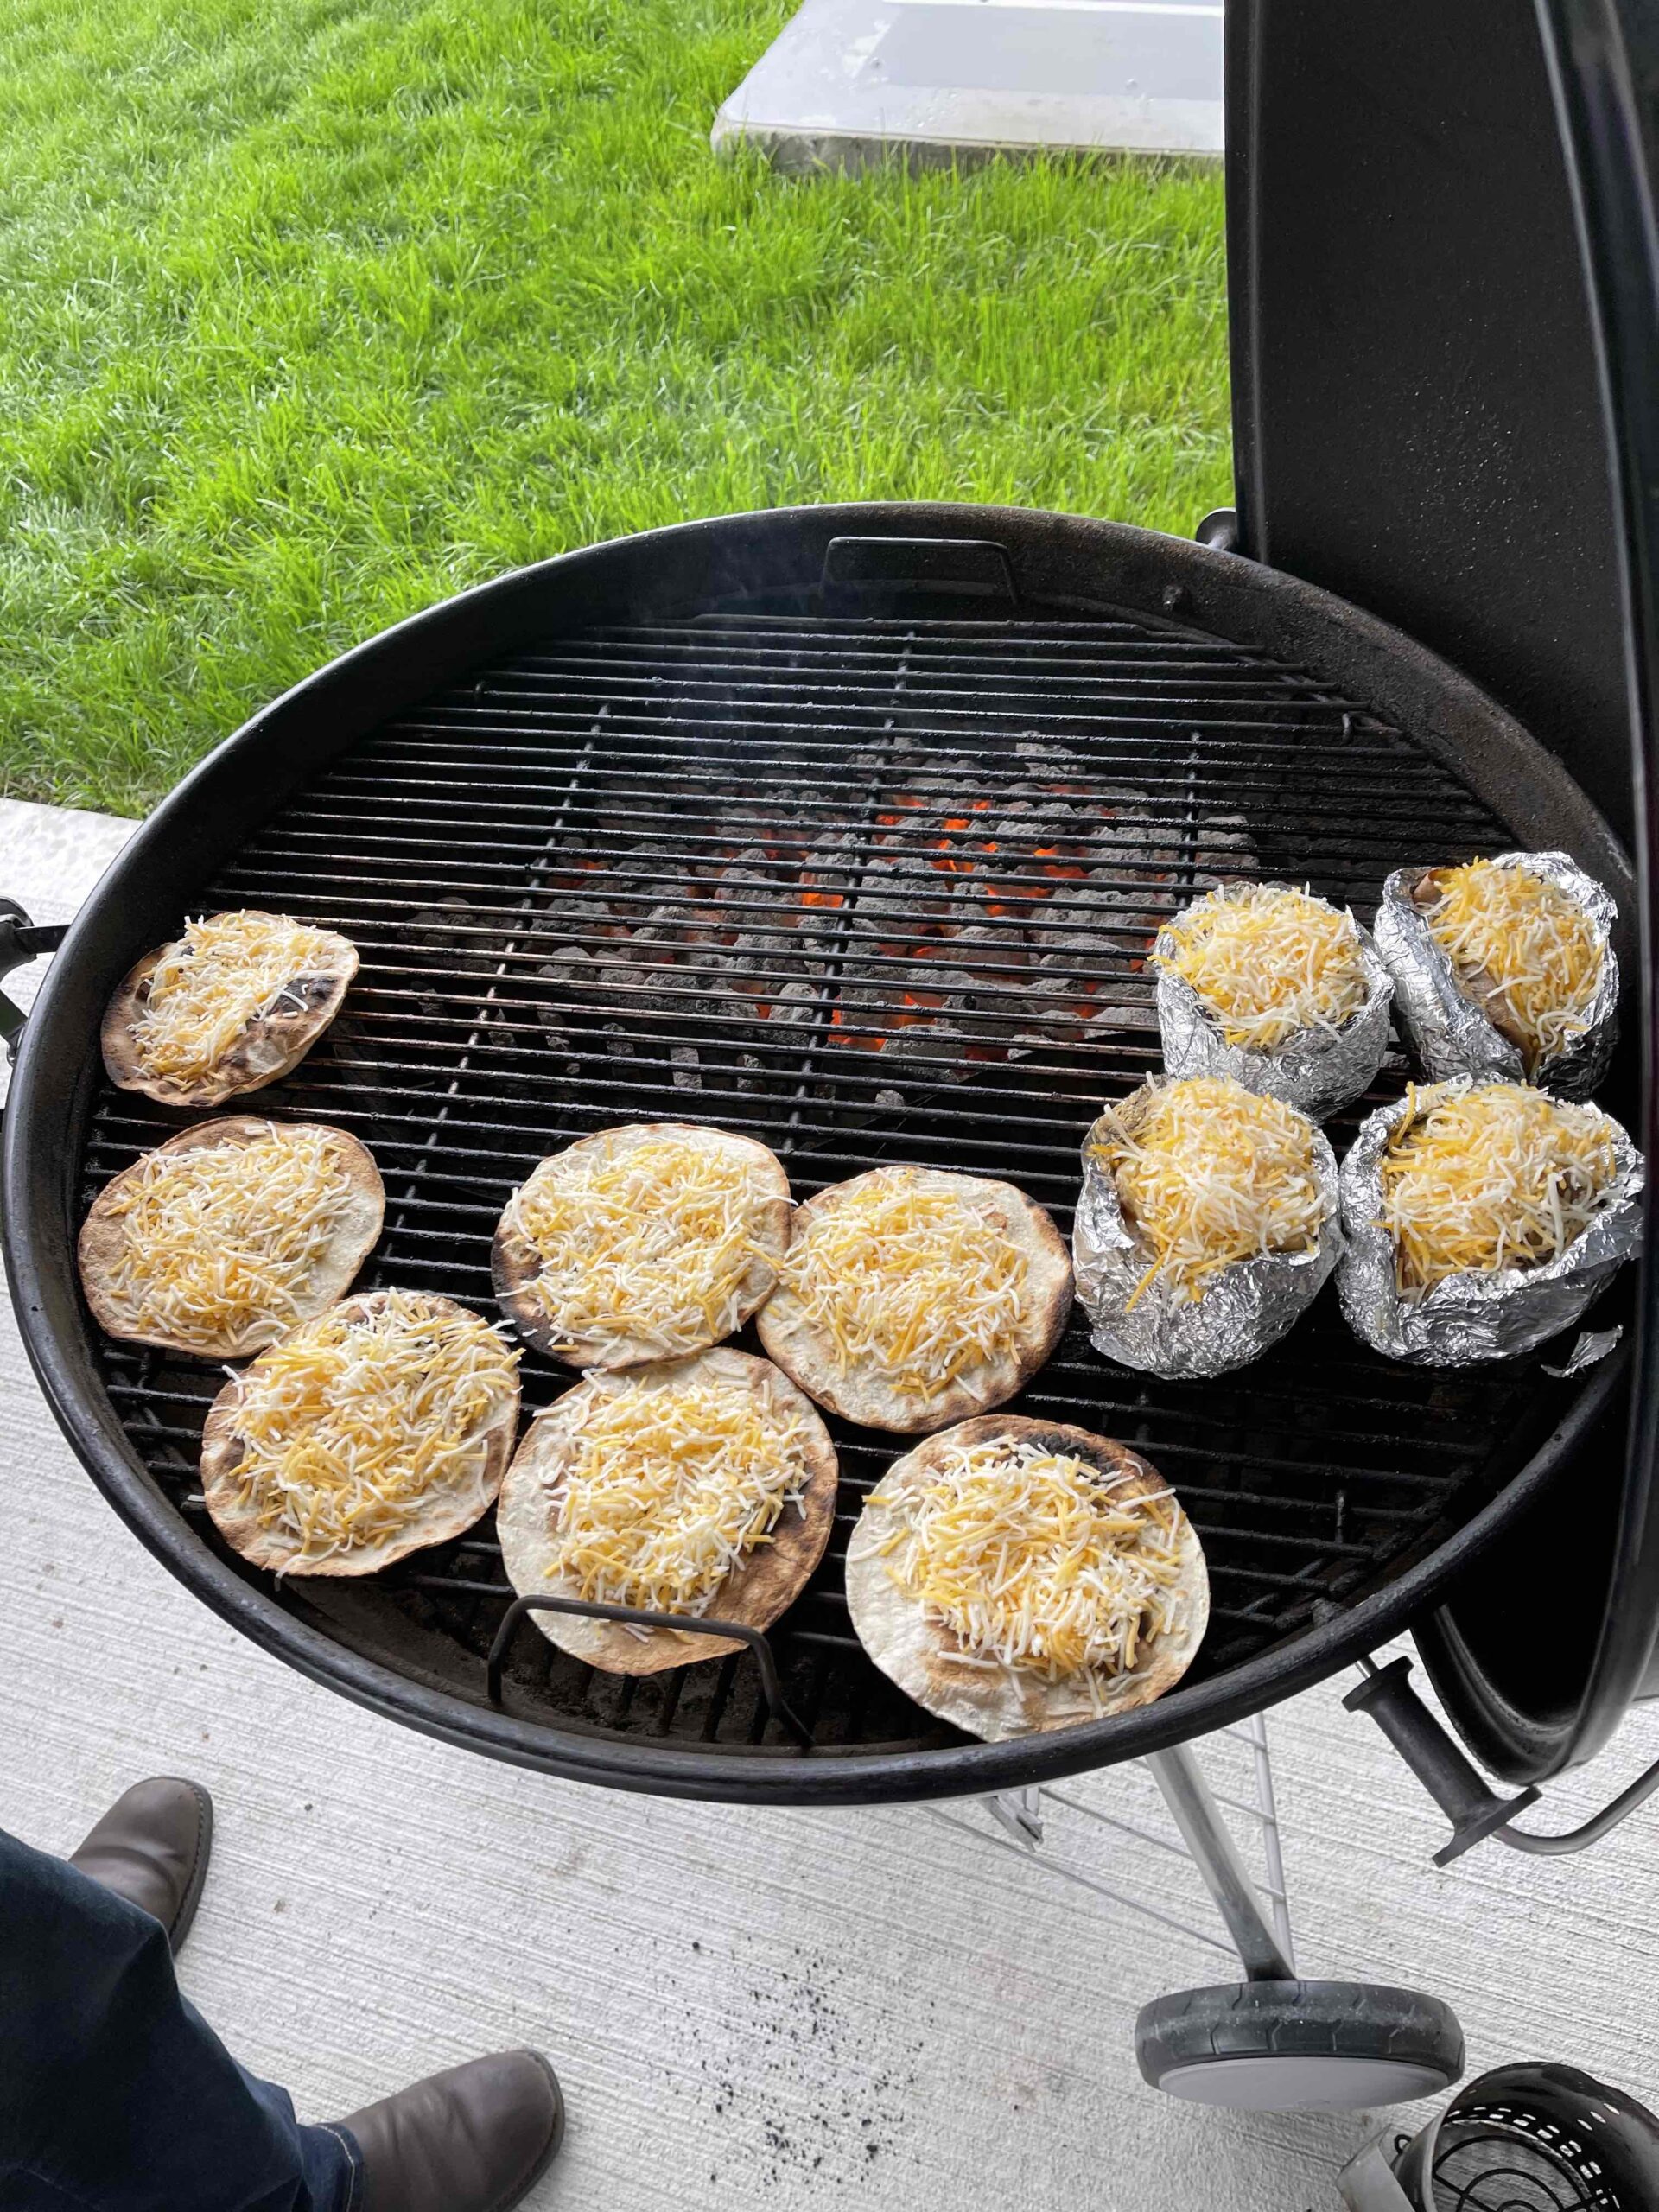
You can also drop some tortillas if you have while everything is on your high heat so you can get some tostadas to add cheese to them at the very end.
Once potatoes are done, take that and the onions out to one side. Then, add more charcoal if more heat is needed (remember we want 350F in medium heat zone) and after smoke is gone place the jalapeños on the high heat zone for a few mins while you take the meat out of the grill and cut it into smaller chunks if needed.
Cooking the Arrachera
This is where everything comes together and timing is super important. We want everything is cooked nicely, not burnt.
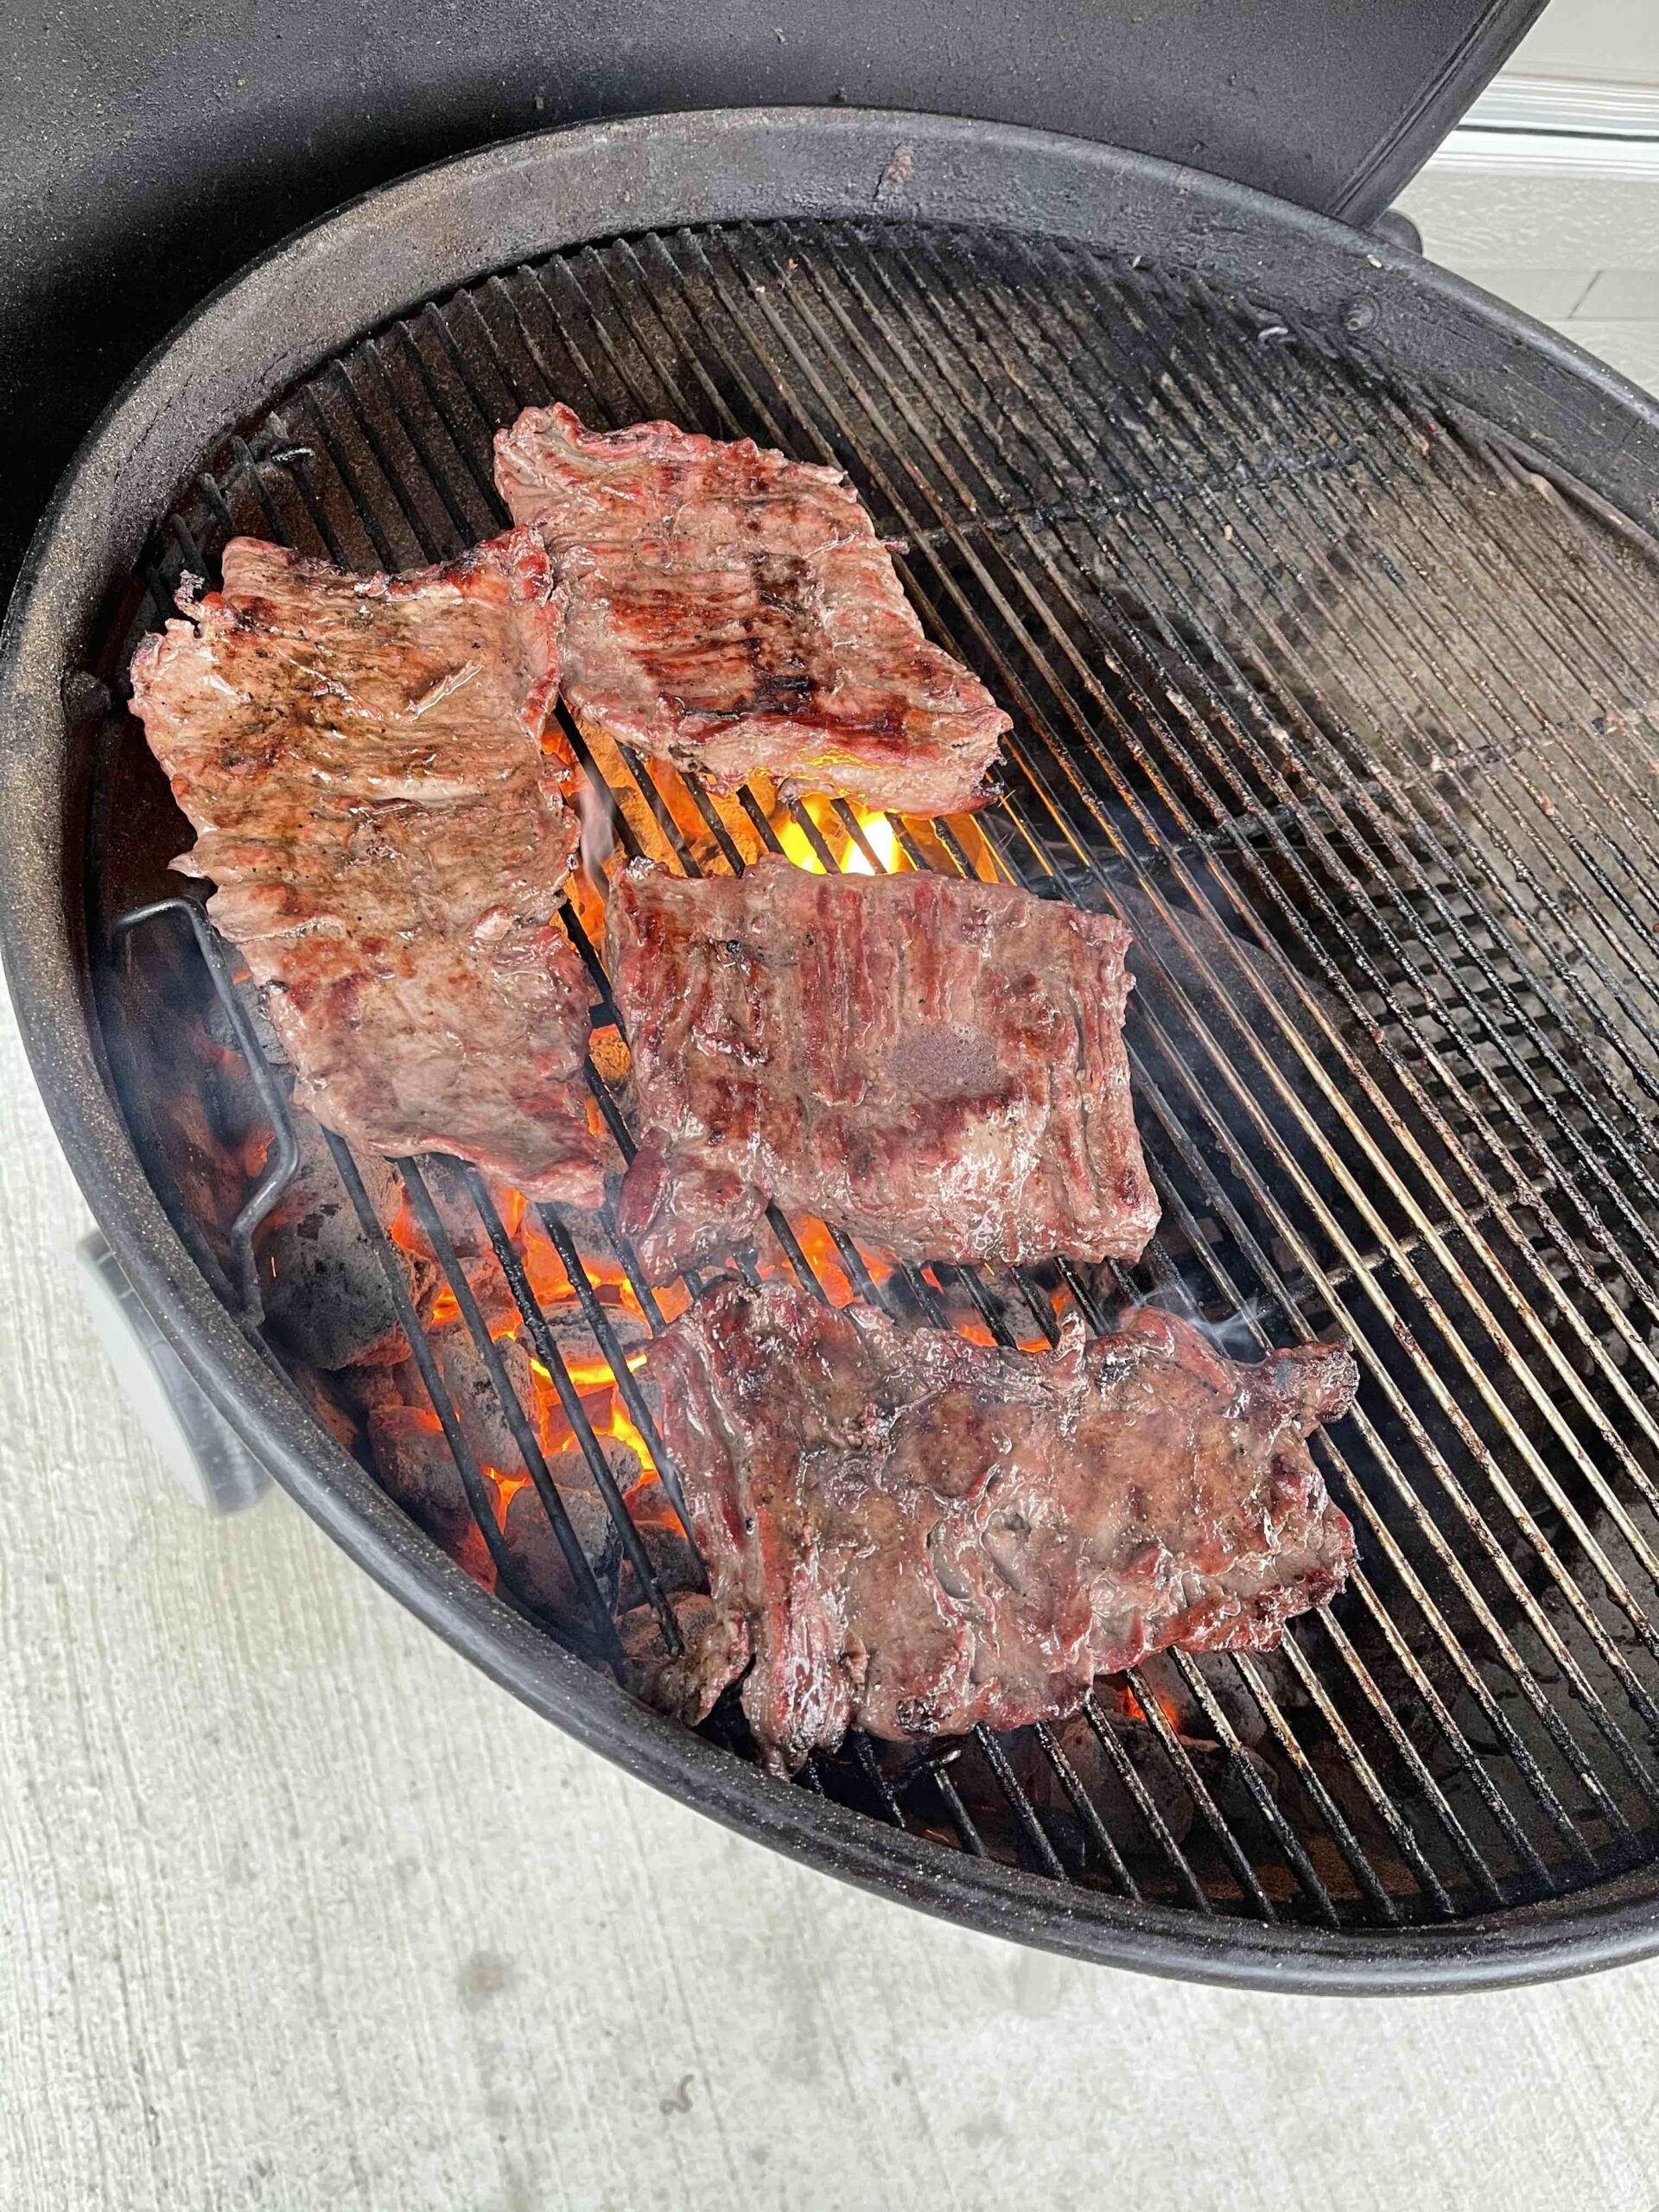
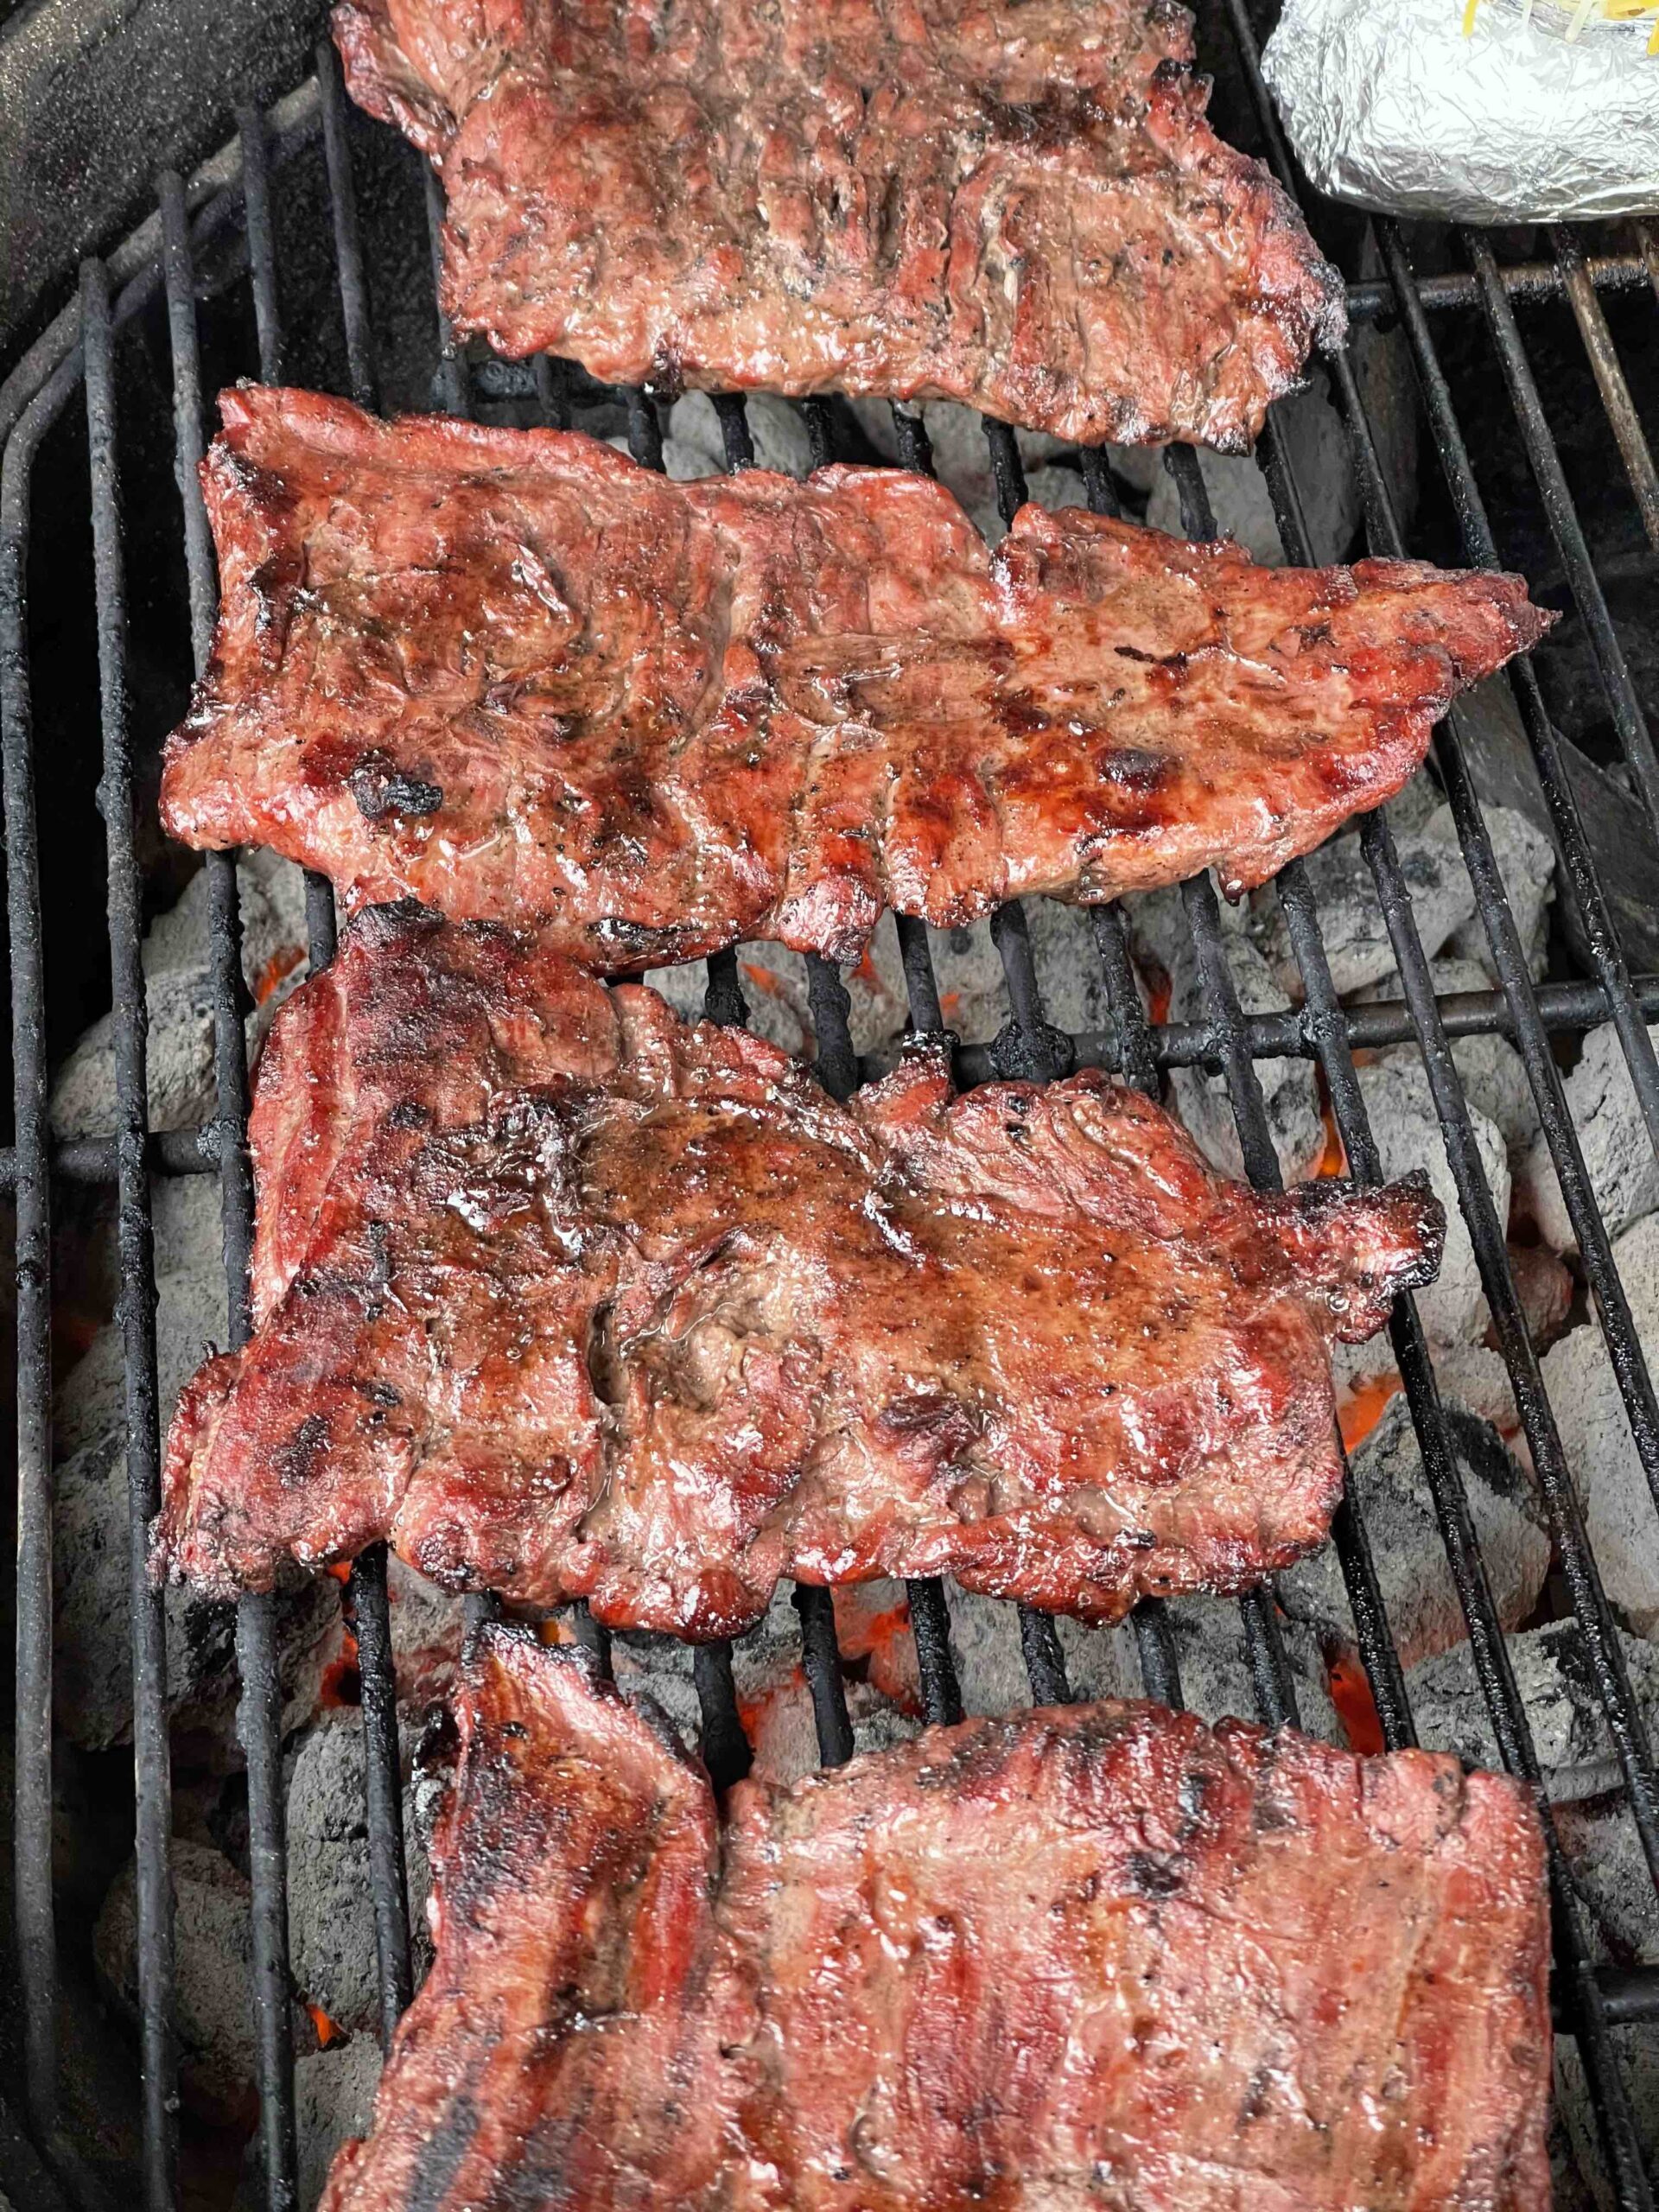
Start by placing the arrachera on the high heat zone to sear it properly, do this while having the lid open. Just sear it for a few minutes and then move it to the medium heat zone and close the lid so it cooks. Leave it cooking for about 15-20minutes.
In the meantime, you can go ahead and prepare the potatoes. I don’t have pictures of the process, I hope I can add some later. But, in short, you just press them down by punching them on the top with your first, then open on the long side with a knife, and finally pressing on the sides to it kinda opens up in the middle. Once you have that, add some butter, salt, and cheese on the top and leave it there since we will finish them later.
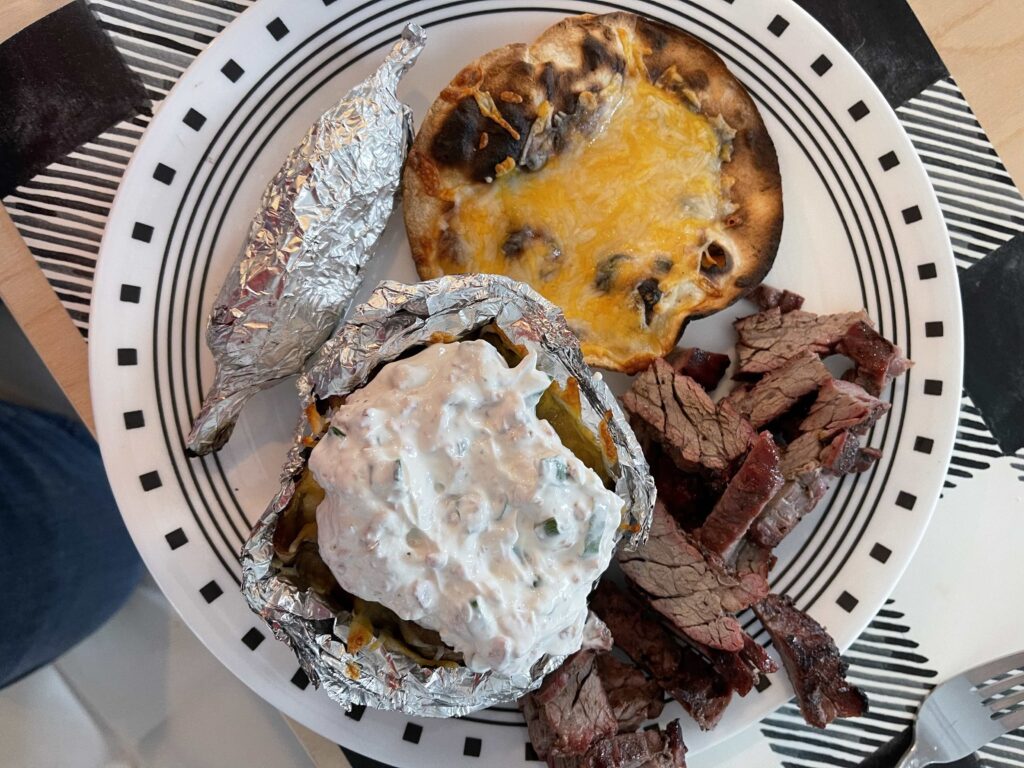
Going back to your steaks, move them to the high heat zone to finish them but be careful about not burning them. You can start adding the potatoes to the medium heat zone so that cheese starts melting. Once the meat is done, take it out and keep it in a pot for 5 minutes. Close the lid on the grill if the cheese on the potatoes is not ready and you can add the tostadas with cheese if you’d like (see my pictures). Once done, take the potatoes out.
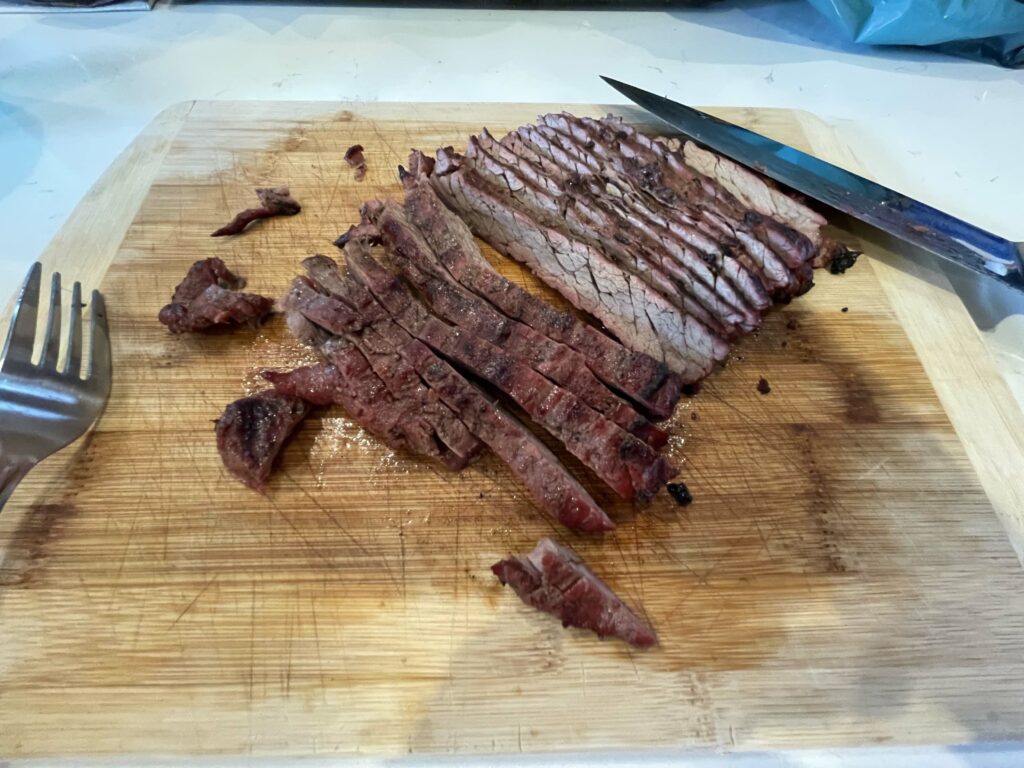
Important: Cutting the meat!
It seems dumb, but cutting the meat yourself might be a decisive factor. It seems dumb, but the meat has to be cut the right way for it to feel tender when biting. This is the same reason why restaurants serve their fajitas this way and don’t give you a big steak with certain types of meat. While some cuts can be served as a full steak; arrachera has to be cut against the grain, just like brisket. This is super important since it might be the difference between someone saying the meat feels tough or that it is perfect. For this reason, I always cut the meat for my family so they don’t have to figure out what “cutting against the grain” means.
Once done, that’s it! Everything is ready for it to be plated. Just get the potatoes and tostadas out of the grill and you can finally sit to enjoy a full meal.
Leave a Reply